A metal detector is a device that uses electromagnetic fields to detect the presence of metal objects. It typically consists of a coil that generates a magnetic field and a control unit that processes the signals. When the detector encounters metal, it produces an audible or visual signal. Metal detectors are commonly used for various purposes, including treasure hunting, security screening, and archaeological exploration.
Discover the secrets of crafting your very own powerful metal detector with our step-by-step guide. Unearth hidden treasures, save money, and explore the world beneath your feet. Learn how to make a powerful metal detector today.
Creating a powerful metal detector involves assembling a coil, control unit, and understanding electromagnetic principles. DIY enthusiasts can find online tutorials and guides for crafting custom metal detectors for various purposes like treasure hunting or science projects.
Understanding the Basics
Understanding the basics of building a metal detector is essential before diving into the DIY project. In this crucial stage, you’ll explore the key components that make up a metal detector and gain insights into the principles of electromagnetic detection. The core components include a coil and a control unit, each playing a vital role in the detection process. The coil generates a magnetic field, while the control unit processes the signals received from the coil when it encounters metal objects.
By grasping these fundamental concepts, you’ll be better equipped to customize your detector’s design and calibrate it effectively. This knowledge will serve as the cornerstone for your entire project, ensuring that you can build a powerful metal detector that suits your needs and preferences. With this solid understanding, you can confidently move on to the practical aspects of gathering tools and materials and commence the construction process.
Tools and Materials
In the process of making a powerful metal detector, understanding the necessary tools and materials is crucial. For this DIY project, you’ll need a set of essential tools like a soldering iron, wire strippers, and pliers to assemble the components effectively. Additionally, gathering the required materials, such as copper wire for the coil, a control unit, and electronic components like resistors and capacitors, is essential. Making a list of all the items you need and ensuring you have them on hand before starting your project will make the building process smoother and more efficient.
It’s important to note that the specific tools and materials you’ll require may vary depending on the design and complexity of the metal detector you’re building. Therefore, following a detailed guide or tutorial that matches your chosen design is highly recommended. With the right tools and materials at your disposal, you’ll be well-prepared to create a powerful and functional metal detector tailored to your needs.
Building the Coil
Building the coil is a crucial step in making a powerful metal detector. The coil is the component responsible for generating the electromagnetic field that interacts with metal objects. To craft a high-performing coil, you need to pay attention to the coiled winding technique. Precision in winding the wire around a suitable core material, such as PVC or cardboard, is essential to ensure the coil’s sensitivity and stability. Customizing the coil’s size and shape to match your specific needs can also enhance its detection capabilities.
In addition to the coil’s construction, optimizing its configuration and dimensions can greatly impact your detector’s efficiency. Experimentation with different coil designs, such as concentric or double-D configurations, can help you tailor the detector’s performance to your target objects and the terrain you intend to search. By refining the coil’s design, you can increase your metal detector’s sensitivity and depth range, making it more effective for various applications, from treasure hunting to scientific research.
Creating a Homemade Metal Detector Using Magnets
A homemade metal detector can be constructed using simple magnets as the sensing elements. Strong neodymium magnets can be paired with coils of wire to detect changes in the magnetic field caused by nearby metal objects. By monitoring the coils for fluctuations in their electromagnetic fields, the detector’s circuitry can sense buried metals and trigger an audio or visual alert. Experimenting with different magnet orientations, coil windings, and circuit designs allows crafters to develop an effective yet affordable homemade metal detector.
Unveiling The Circuit Diagram for a Potent Metal Detector
With the right circuit blueprints, determined do-it-yourselfers can assemble capable metal detectors in their workshops. A basic metal-detecting circuit uses an oscillator to produce an alternating electromagnetic field and search coils to detect disturbances caused by metals. Comparing the phase and amplitude of signals from parallel coils indicates the presence of buried items. Tweaking components like capacitors, resistors, and transistors allows optimizing the circuit’s sensitivity, range, and ability to discriminate target metals. By studying online diagrams, builders can gain the electronic know-how for crafting potent custom detectors.
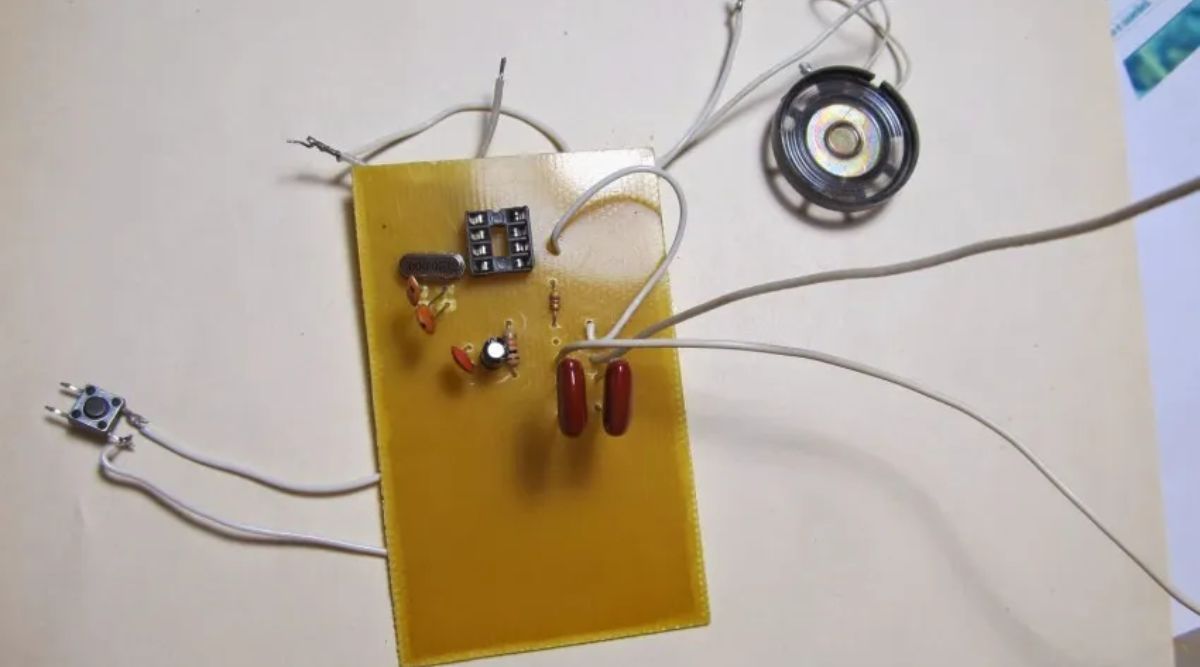
Constructing Your Own Metal Detector with a DIY Circuit
Aspiring metal detector artisans need not purchase prefab devices when simple circuits can be homemade. Search coils, printed circuit boards, and common electronic parts enable do-it-yourself constructions. Experienced hobbyists understand metal detection principles, allowing custom circuits to identify buried targets. Experimentation is key – testing designs iteratively improves functionality. With practice, builders fine-tune circuits to outperform shop-bought models. Sharing blueprints empowers others, growing the creative metal detecting community. Determination and tinkering develop finely-crafted DIY detectors.
Crafting a Robust Metal Detector in Your Own Home

Resourceful metal detector hobbyists craft durable, functional devices from readily available components. Search coils, circuit boards, and waterproof casings protect electronics from dirt and moisture. Experimenting with different coil types and orientations maximizes detection abilities. Solar panels or rechargeable batteries replace disposable cells for eco-friendly prolonged use. Adjustable settings like sensitivity and audio volume provide customization. Creating robust, versatile detectors at home sparks passion for treasure hunting while reducing equipment costs. With clever designs and perseverance, DIY crafters unleash rewarding detecting adventures.
Seeking a PDF Guide on Building a Gold Detector at Home
Aspiring prospectors can learn to pan for gems or craft detectors. Online tutorials and schematics teach construction techniques. Standard circuits detect a range of metals but dedicated designs target precious gold. Carefully crafted coils and optimized circuits boost gold signals over mineralized grounds. Adjustable settings allow prospectors to discern gold from foil. Online guides provide component lists, circuit diagrams, construction steps, and testing procedures. With detailed PDF blueprints, novices gain metal detecting skills while avoiding expensive device costs. Downloading free gold detector plans empowers self-sufficient treasure hunting from the comforts of home.
Crafting a Gold Detector in the Comfort of Your Home
For hobbyists seeking rewarding outdoor adventures, nothing compares to discovering gold nuggets in local streams. However, quality metal detectors prove too expensive for many enthusiasts. Fortunately, online schematics provide gold prospectors instructions for building capable detectors at low costs. With basic soldering skills and electronic components available from local stores, crafters can construct effective detectors following step-by-step guide PDFs. Customizable designs allow enthusiasts to optimize circuits targeting gold’s distinct signals. By learning electronics while crafting detectors at home, prospectors gain satisfying skills and affordable access to productive treasure hunting.
Unleashing the Power of a Homemade Gold Detector
With some electronics know-how and readily available parts, gold enthusiasts can craft capable metal detectors. Online guides provide circuit designs and construction steps allowing builders to fine-tune detectors for various environments. Optimizing parameters like waveform shape and coil geometries boosts gold signals over mineralized grounds. Adjustable settings allow prospectors to identify gold targets. As prospecting skills develop through use of homemade detectors, find totals improve. Sharing build experiences inspires others to craft capable detectors affordably. Whether treasures found paid for parts or not, the empowering experience of unleashing one’s detector design proves truly rewarding for dedicated DIY prospectors.
Assembling the Control Unit
Assembling the control unit is a critical step in the process of building a powerful metal detector. This component serves as the brain of your device, responsible for interpreting electromagnetic signals from the coil and providing the user with feedback. It involves connecting various electronic components, such as capacitors, resistors, transistors, and an integrated circuit, in a specific configuration. Proper wiring and circuitry are crucial to ensure the detector’s accuracy and reliability.
Once you have all the necessary components in place, it’s essential to carefully follow the circuit diagram or instructions provided in your project guide. The control unit is where you can fine-tune settings, such as sensitivity and signal processing, to match your specific detection needs. Properly assembled and calibrated, this unit will play a pivotal role in transforming electromagnetic signals into tangible results, allowing you to detect hidden treasures or metallic objects with precision.
Calibration and Testing
Calibration and testing are crucial steps in the process of building a powerful metal detector. Once you’ve assembled the coil and control unit, it’s essential to fine-tune your device to ensure it’s operating optimally. Calibration involves adjusting the sensitivity and discrimination settings to achieve the desired detection range and accuracy. You may need to experiment with these settings to strike the right balance between detecting valuable metals and filtering out unwanted signals from common materials like nails or bottle caps.
After calibration, thorough testing is necessary to verify the performance of your homemade metal detector. Take your detector out to different locations with varying soil conditions and try it on different metal objects. This practical testing phase will help you understand how your device responds in real-world scenarios and allow you to make any necessary adjustments to achieve the best results. Proper calibration and testing ensure that your DIY metal detector is reliable and efficient in its metal-detecting capabilities, enhancing your treasure-hunting or scientific pursuits.
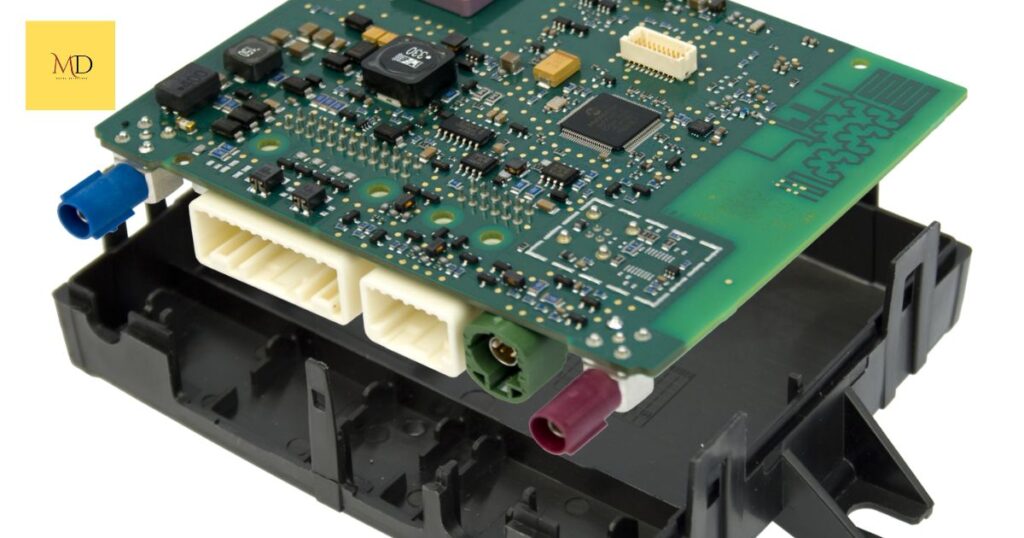
Electronic Components
Electronic components are the essential building blocks of modern technology. They encompass a wide array of devices that manipulate and control electrical currents to perform specific functions. These components can be as simple as resistors and capacitors, or as complex as microchips and integrated circuits. Electronic components are used in virtually every electronic device we encounter daily, from smartphones and laptops to household appliances and industrial machinery.
The world of electronic components is vast, with each component having a unique role to play in the operation of electronic systems. Resistors regulate the flow of current, capacitors store and release electrical energy, and transistors act as switches or amplifiers, just to name a few. Understanding the characteristics and functions of these components is crucial for engineers, hobbyists, and technicians working with electronics, as it allows them to design, troubleshoot, and maintain electronic systems effectively.
FAQ’s
Can you make a metal detector more powerful?
Yes, you can enhance the power and sensitivity of a metal detector by optimizing its design, using higher-quality components, and fine-tuning its calibration.
What makes a metal detector stronger?
A metal detector’s strength is determined by various factors, including the size and quality of its coil, the power of its electronic components, and its ability to discriminate between different types of metals.
Is it possible to make a homemade metal detector?
Yes, it is possible to make a homemade metal detector using readily available materials and components, along with some basic knowledge of electronics and electromagnetic principles.
Conclusion
In conclusion, creating your homemade metal detector is an achievable and rewarding endeavor for DIY enthusiasts and hobbyists. With the right guidance and a basic understanding of electronic components and electromagnetic principles, you can craft a functional device that allows you to explore the exciting world of metal detection. Building your metal detector provides a sense of accomplishment and a deeper connection to the technology you use daily.
Furthermore, the applications of a homemade metal detector are diverse, ranging from treasure-hunting adventures to educational projects and scientific research. It opens up a world of possibilities for both fun and practical purposes. So, whether you’re driven by curiosity, a passion for treasure hunting, or a desire to understand the inner workings of electronic devices, making your metal detector is an accessible and educational DIY project that can be a gateway to countless exciting experiences. Get started, and embark on your journey to make a powerful metal detector today. Learn more about Metal Detectors “Do Vapes Go Off In Metal Detectors?“